Spaghetti Cacio e Pepe

The beauty of this dish lies in its Roman origins and it’s simplicity.

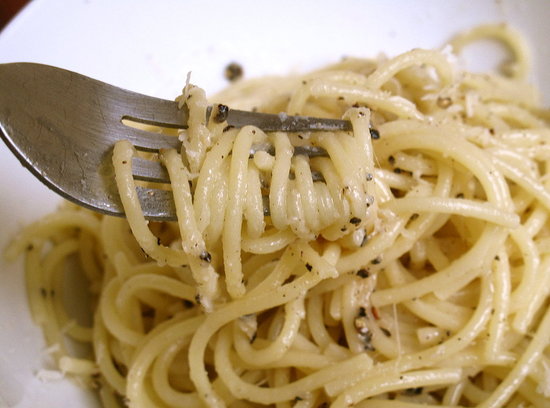
Pasta cacio e pepe (“cheese and pepper”) is made with Pecorino Romano and lots of freshly ground black pepper.

1 – pound spaghetti
1 cup freshly grated Pecorino Romano cheese
1/2 cup Parmigiano Reggiano
2 tablespoons coarsely ground black pepper
2 tablespoons extra-virgin olive oil
Salt

  1. In a large pot of boiling salted water, cook the pasta until al dente.
  2. While the pasta is cooking, lightly toast the pepper in the olive oil, then turn the heat off and let it sit until the pasta is ready.
  3. When the pasta is done, turn on the heat to oil, add the pasta to that pan along with some of the pasta water. Toss, add the cheese, continue tossing, add more pasta water, season with salt; toss again and serve.

Mushroom and Fontina Pizza

Here is a very simple pizza recipe.

Makes 1 12″ Pizza

~

Ingredients

1 packet active dry yeast
3 cups flour
salt
3 tbsp. Extra-Virgin Olive Oil
6 oz. assorted wild mushrooms, sliced
1 tbsp. fresh thyme leaves
Freshly ground black pepper
3 medium shallots, peeled and sliced
2 tbsp. red wine vinegar
3 plum tomatoes, seed and coarsely chopped
2 cups freshly grated fontina
1/4 cup freshly grated parmesan

~

  1. Dissolve yeast in 1/4 cup warm water in a large bowl. Set aside for 10 minutes. Combine flour and 1 tsp. salt in a medium bowl. Add flour mixture to yeast, a little at a time, moistening  with up to 3/4 cup water as you mix. Alternately, you could pulse the mixture in a food processor just until it forms a ball. Dough should be soft but not wet.
  2. Turn out dough onto a lightly floured surface. Knead until smooth, 10 minutes. Form into a ball and place in a lightly greased bowl. Cover with a damp towel; set aside in a warm place to rise until doubled in bulk, 2 – 3 hours.
  3. Set a pizza stone in the middle of your oven and preheat oven to 500 degrees. Heat 2 tbsp. oil in a large nonstick skillet over medium-high heat. Saute mushrooms, seasoning with thyme leaves, salt and pepper. Cook until browned, about 5 minutes. Set aside.
  4. Heat remaining oil in a skillet over medium heat. Add shallots and cook until wilted, 5 minutes. Add vinegar slowly, cook for 2 minutes. Stir in tomatoes, cook for 2 more minutes, and season with salt and pepper.
  5. To assemble the pizza, stretch the dough into a 12″ round, pinch the edges to form a ridge, and sit dough on a pizza peel dusted with flour. Cover with half the fontina, all the mushrooms, and all the tomato mixture. Top with the remaining fontina and parmesan. Slide the pizza into the oven, onto the stone. Bake until crust is golden, about 15 minutes. Garnish with more thyme sprigs.

NB: A bit of truffle oil strewn across this pizza can only bring happiness!

Making Wine at Home: Pressing the Grapes

We have already covered:

Step 1: The Equipment: Getting Started – Early October – A list of everything you need to make wine and where to find it.

Step 2: Grape Selection – A guide to choosing the right grape.

Step 3: Sanitizing – The importance of maintaining a clean work area and proper sanitizing procedures.

WINEMAKING (October / November)

Day 1: Sorting and Treading – The first day of the wine-making process, including stomping on the grapes.

Day 3 – 10: Punching and Fermenting – Caring for the grapes, adding nutrients and monitoring the fermentation process.

So, you’ve been punching and stirring your grapes 2x day and you’ve been taking a hydrometer reading daily. It can take anywhere from 3 to 26 days for your grapes to be ready.

When the hydrometer reads 0 or – 1… It’s time to Press Those Grapes!
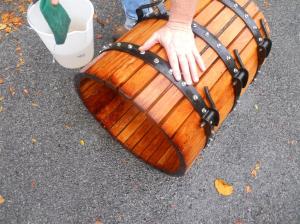
Sanitize the Press:
Thoroughly sanitize your press with Soda Ash and Citric Acid.
Use 1/4 cup of Soda Ash dissolved in 1 gallon of water. Brush the press clean and then discard the solution and rinse with plain water. Follow the same instructions using the Citric Acid.

Sterile Rinse:
Give the demijohns a sterile rinse by dissolving 4 tablespoons of META in 1 gallon of water. Run this solution through all of the demijohns shaking the bottles as you go. Rinse with plain water.

Sit your press on a table with the empty, sanitized demijohns (carboys) on the floor near the press. Place a large funnel into one of the demijohns and sit it directly under the spout of the press so that the juice can fall directly into it.
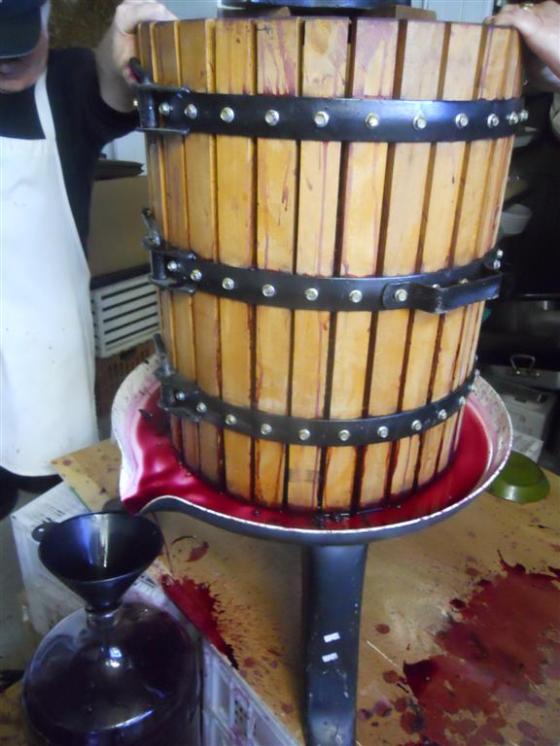
Using a large pitcher or pail, scoop out some of the grapes and juice and start filling the press. The juice that pours out from the press is called “free run” juice because you have not pressed it yet. This is the best quality so you want to spread it across all of your demijohns evenly. Some of the world’s most respected wineries will use only this “free run” juice for their best or reserve wines and then use the pressed juice for their less expensive wines.

After your vat has been emptied into the press and all the “free run” juice has been spread evenly among all the demijohns you can begin to press the grapes to realease the remaining juice, topping off all of the demijohns. It’s good to have help in doing this so that one person can remove a full demijohn as another person replaces it with a half full demijohn without spilling too much .
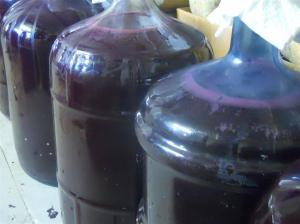
The wine should be very alive at this stage, warm and bubbly…that means it’s fermenting!

Place a bung into each demijohn and tape it down with clear packing tape. If you don’t tape it down, the natural gases will cause the bung to fly out. Take your sterilized fermentation traps and fill them halfway with water. Poke a hole through the tape and insert a fermentation trap into each bung. The wine will bubble as the gas slowly escapes through the traps.
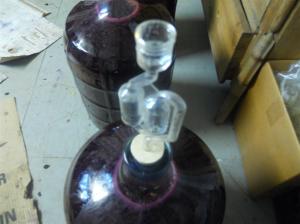
Place the demijohns in a warm place (65 – 75 degrees) for 7 days to complete the fermentation process.

NB: Thoroughly clean the press and all other tools and equipment.

You can also prepare the wine area for next week’s crucial step of siphoning (racking) the wine to clean demijohns. I’ll also discuss winter storage and cold stabilization.

See you then!

~

© Giovanni Cucullo 2011
Eggs, Rutabaga, Sumac & Fried Sage

Rutabagas! I love that word. In the world of funny food names, I think it’s up there with kumquat and sassafras.

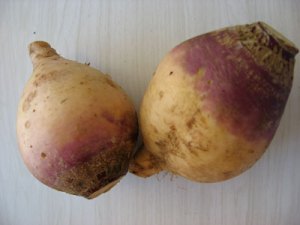
The rutabaga is a cross between a cabbage and a turnip. People often avoid this root vegetable because of its peculiarity and because, like cabbage, it becomes more flavored and odorous when cooked.

Rutabagas are available year round with a peak in the fall and winter. These roots range from tan to violet in color and are larger than turnips; choose smooth, heavy, and firm roots. Smaller rutabagas, 4″ in diameter, tend to have sweeter flavor. This root stores for about 2 weeks in the refrigerator or at room temperature for a week. Rutabagas are usually covered in wax, so it’s best to quarter the root, then peel the skin before cooking.


Sumac spice comes from the berries of a wild bush that grows wild in all Mediterranean areas, especially in Sicily and southern Italy, and parts of the Middle East, notably Iran. It is an essential ingredient in Arabic cooking, being preferred to lemon for sourness and astringency

As a side dish or a nice alternative to potatoes or grits, Rutabaga purée is an excellent choice. I simply peeled the rutabaga, cut it into medium-sized chunks and cooked them as I would mashed potatoes, whisking in butter and cream at the end. If it tickles your fancy, you could do as the Irish do and add turnips or potatoes to the purée…I think they call it “Pats and Nips.”

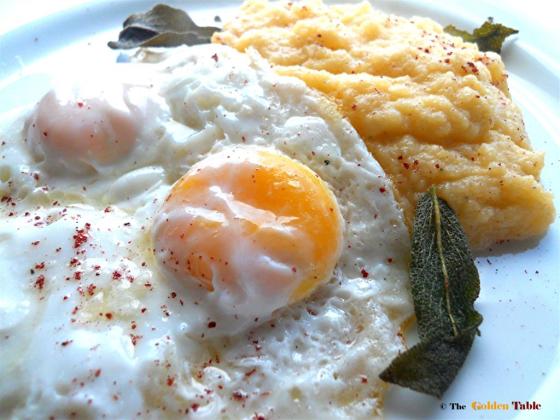
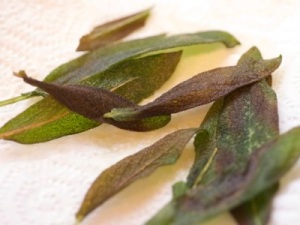
I fried some sage leaves and set them aside on paper towels, then slowly braised two eggs in butter for a few minutes. I served the eggs with the rutabaga purée and fried sage leaves, then sprinkled some sumac over it to give it that whisper of citrus.

The kitchen had that wonderful odor of a grandmother cooking cabbage. I think next time, I’ll use the rutabaga as a substitute for cabbage and see what happens. Perhaps I’ll add rutabaga to slow-braised pork!

~

© Giovanni Cucullo 2011

The Noble Cardoon

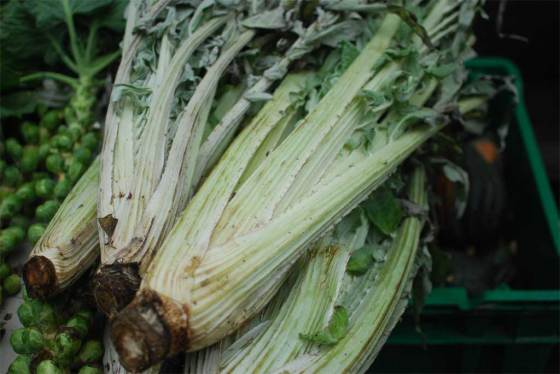
Cardoons or carduni, as my father calls them, are a member of the thistle family, resembling celery stalks but with a flavor reminiscent of artichokes. Cardoons are only available from November to February and even then it would take a bit of effort to find some. It’s obscurity, combined with its high-maintenance preparation has deterred many people from even approaching them, but this noble thistle – which centuries ago was called the wealthy man’s treat – surely deserves some attention.

After separating the stalks, they must be thoroughly rinsed and then trimmed of all thorns and leaves. The indigestible stringy fibers are then shaved off with a vegetable peeler. The stalks are then roughly chopped and allowed to soak in acidulated water (water with lemon or vinegar).  Lastly, they are parboiled to take away some of its bitterness.

Cardoon Gratin Recipe:

3 cups heavy cream
1 cup chicken stock
1 bay leaf
3 lbs. cardoons, prepared as above
1 cup grated fontina

  1. Place cream, stock, and bay leaf in a large saucepan and season with salt and pepper. Place cardoons into the cream mixture.
  2. Bring cream mixture to a simmer over medium heat and cook, stirring occasionally, until cardoon are tender, about 30 minutes. Using a slotted spoon, transfer cardoon pieces to individual gratin dishes (or a 1-quart baking dish).
  3. Preheat oven to 350 degrees. Reduce cream mixture to about 3/4 cup over medium heat. Discard the bay leaf and pour the sauce over the gratin dishes, sprinkle the fontina on top, and bake until golden and bubbly, about 30 minutes.

One of my favorite Italian restaurants is al di la in Park Slope Brooklyn, and that is the only restaurant where I have ever seen cardoons on the menu.